How to Integrate Claude Code with Figma (Step-by-Step Guide for Designers & Developers)

The way designers and developers collaborate is evolving fast. Tools like Figma and Claude Code are now making it possible to move back and forth between design and code seamlessly.
Previously, you could take designs from Figma and convert them into code. But now, the workflow has become two-way — meaning you can also convert your code back into Figma design files.
In this guide, you’ll learn exactly how to set up and use this integration step by step.
Why This Integration Matters
This workflow is a big deal because it:
- Saves hours of manual design recreation
- Helps designers and developers collaborate better
- Allows real-time iteration between UI and code
- Bridges the gap between design and development
Whether you're building dashboards, SaaS tools, or landing pages — this can seriously speed up your process.
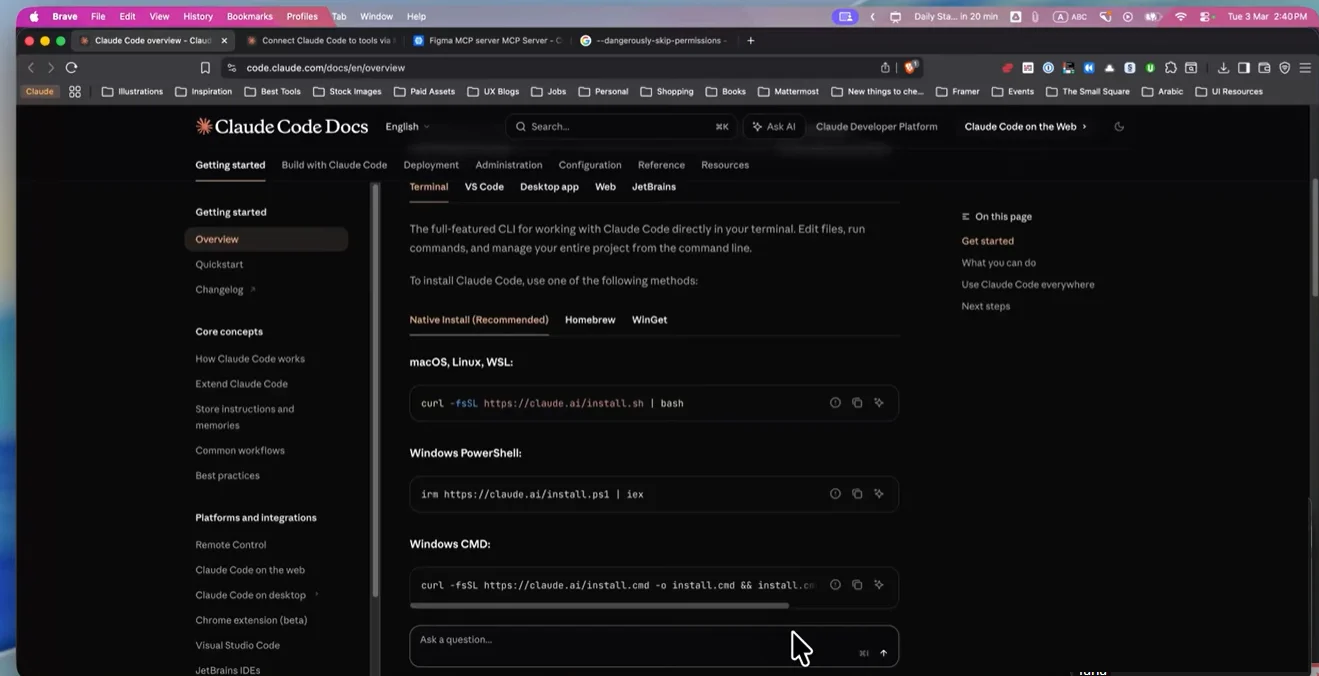
Step 1: Install Claude Code
First, you need to install Claude Code on your system.
You can run it either:
- Inside the desktop app
- Or via CLI (recommended for better control)
Once installed, open your terminal and simply type:
claude
If you see a welcome message, that means everything is working correctly.
Step 2: Install Figma MCP Server
Next, you need to install the Figma MCP (Model Context Protocol) server.
This is what allows Claude Code to communicate directly with Figma.
After installation, you should see confirmation like:
“Figma MCP server is already installed”
Step 3: Install Claude Code Plugin
Now, install the required Claude Code plugin.
This step connects:
- Your code environment
- With your design system
Once installed, you’re ready to start creating and syncing designs.
Step 4: Create a UI Using Claude Code
Now comes the fun part.
You can prompt Claude Code to generate UI directly. For example:
Create a dashboard design for a dental management system using shadcn
Claude will generate an HTML (or React) file such as:
dental-dashboard.html
Open it in your browser to preview the UI.
You’ll typically get:
- Sidebar navigation
- Dashboard widgets
- Buttons and UI components
It may not be perfect, but it gives you a strong starting point.
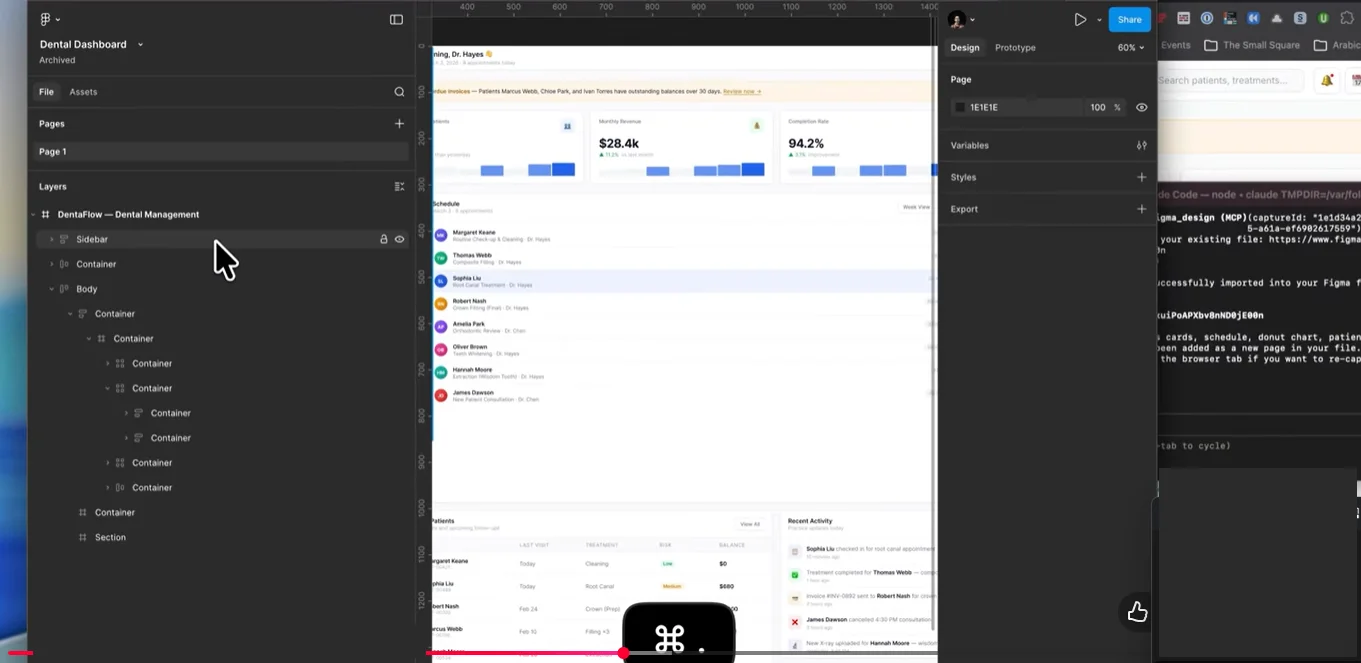
Step 5: Import Code into Figma
Now you can bring your design into Figma.
Here’s how:
- Open your Figma file
- Copy the file link
- Paste it into Claude Code
- Trigger the import
Claude will:
- Convert your HTML/React UI
- Recreate it inside Figma
- Apply layout structures (like auto-layout)
This means your code becomes an editable design file instantly.
Step 6: Edit Design in Figma
Once inside Figma, you can:
- Adjust layouts
- Move components
- Update spacing and alignment
- Improve UI/UX
For example:
- Move profile section to top-right
- Add buttons to sidebar
- Adjust padding and responsiveness
Step 7: Sync Changes Back to Code
This is where things get powerful.
After editing in Figma, you can tell Claude:
“Implement the changes I’ve made into the live code”
Claude will:
- Analyze the design
- Detect changes
- Update your HTML/React code
Note: It’s not perfect yet — sometimes small UI elements (like icons) may break, but you can fix them with follow-up prompts.
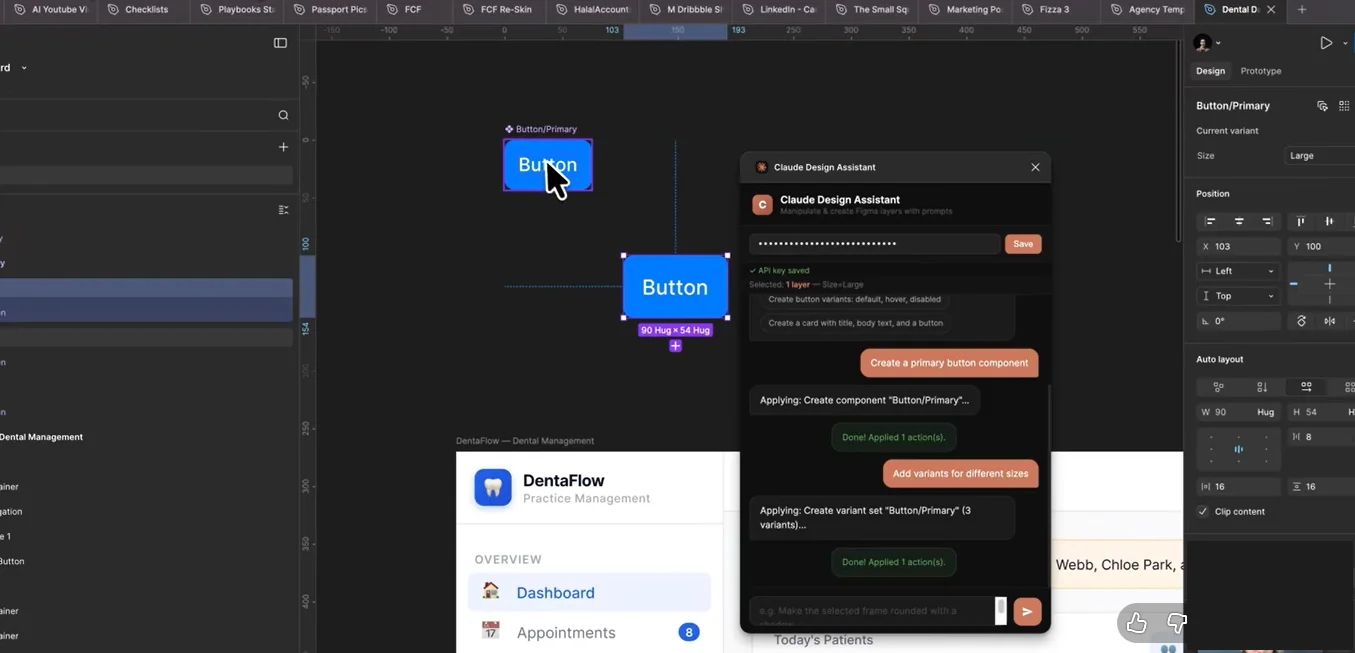
Alternative Workflow: Design Directly Inside Figma with Claude
Some users prefer the opposite approach:
👉 Start designing inside Figma
👉 Use Claude to generate components
You can do this using API integration:
- Generate an API key
- Connect Claude to Figma
- Prompt it to create components
Example:
Create a primary button with size variants
Claude will generate:
- Small, medium, large variants
- Styled components
However, results may need manual cleanup.
Best Practices for Better Results
To get the most out of this workflow:
- Give clear and detailed prompts
- Ask for complete components at once (avoid step-by-step prompts)
- Always review layout structure in Figma
- Expect minor fixes after syncing
Limitations (Right Now)
While powerful, it’s still evolving:
- Not fully responsive layouts
- Occasional UI inconsistencies
- Component duplication issues
- Layout stacking problems
So it’s best used as a productivity tool — not a final solution (yet).
Final Thoughts
The integration between Figma and Claude Code is a glimpse into the future of design and development.
It allows you to:
- Prototype faster
- Iterate smarter
- Reduce repetitive work
While it’s not perfect yet, it’s already incredibly useful for:
- MVPs
- Rapid prototyping
- Internal tools
If you're working on modern UI/UX workflows, this is definitely something worth experimenting with.
Explore More with the small square
If you want to implement advanced AI workflows like this for your projects, explore more insights and services at The Small Square.


Accepted Payments

